
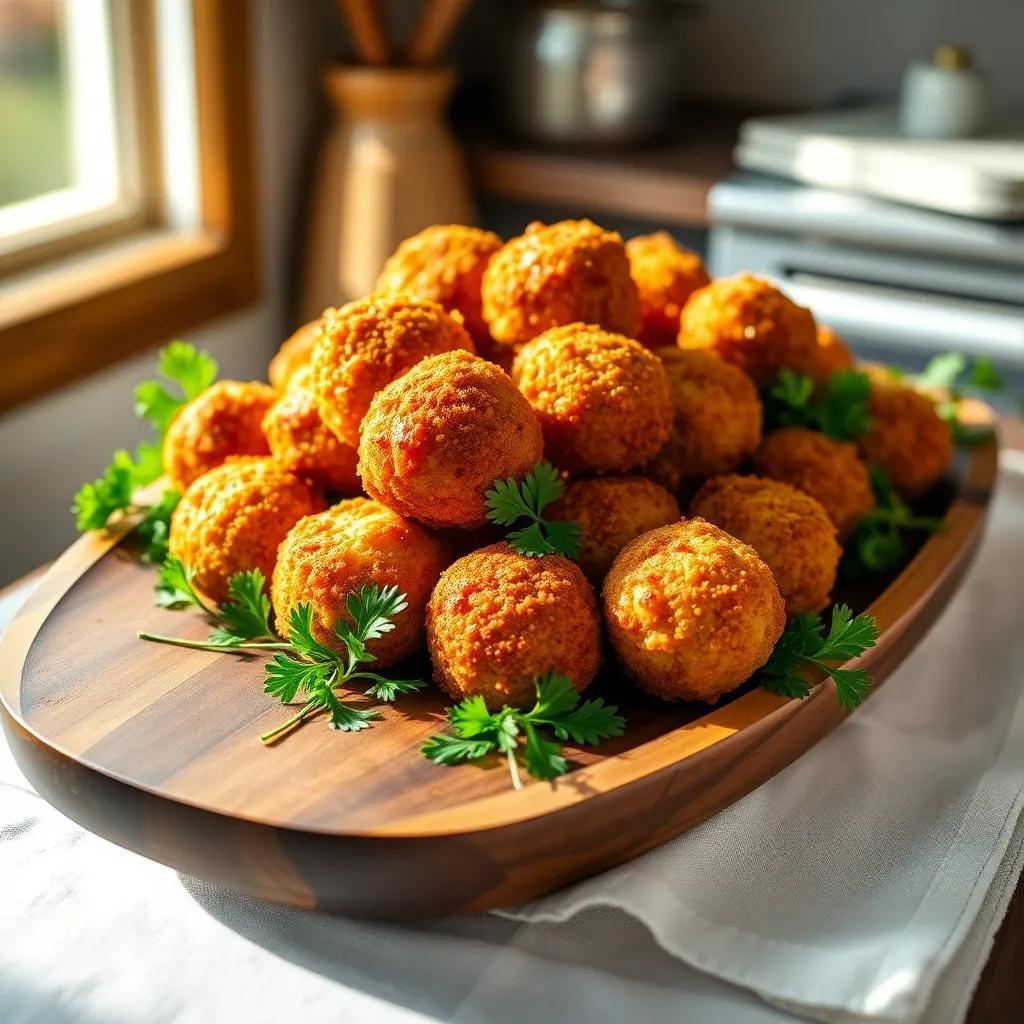
air fryer chicken kiev balls
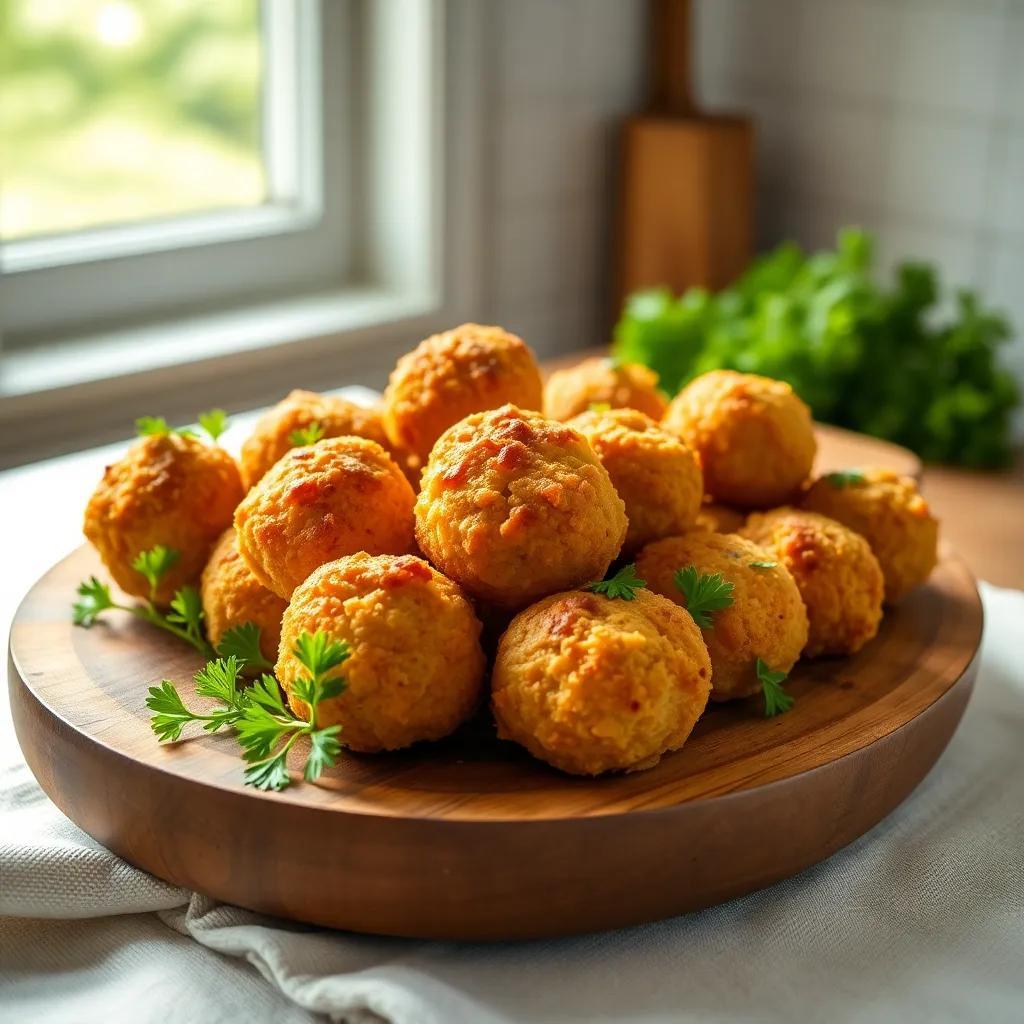
Are you ready to take your snack game to the next level? These Air Fryer Chicken Kiev Balls are crispy on the outside and bursting wiht flavor on the inside—trust me, they’re a crowd-pleaser! Whether you’re prepping for game day or just a cozy night in, I can’t wait to share this delicious recipe with you!
Simple Ingredients for Delicious Air Fryer Chicken Kiev Balls
Getting the ingredients together is a straightforward process for these air Fryer chicken Kiev Balls. You’ll find that most of the items are pantry staples or easily found at your local grocery store. Here’s what you’ll need to create this tasty dish:
- ½ cup unsalted butter: This will be the base for your flavorful filling.
- 2 tablespoons chopped fresh flat-leaf parsley: Fresh herbs add a vibrant taste.
- 2 cloves garlic, crushed: A must for that aromatic kick.
- 1 (16 ounce) package ground chicken breast: The star of our dish!
- 2 large eggs: These will help bind everything together.
- 1 cup panko bread crumbs: for that delightful crunch.
- 1 teaspoon paprika: Adds a subtle warmth and color.
- 1 teaspoon salt: Essential for enhancing flavor.
- ½ teaspoon ground black pepper: A little heat to balance the richness.
- Cooking spray: To help the balls crisp up beautifully in the air fryer.
With these ingredients, you’re all set to make something truly delicious! Don’t shy away from customizing this recipe to suit your tastes. For example, feel free to mix in different herbs or spices if you want to experiment. now let’s dive into the step-by-step instructions that will make cooking these chicken Kiev balls both fun and fulfilling!
Step-by-Step Instructions for making Air Fryer Chicken Kiev Balls
Ready to get cooking? These Air Fryer Chicken Kiev Balls are a breeze to make with just a few simple steps. Let’s turn those ingredients into mouthwatering treats. Here’s how to do it:
- prepare the Garlic Butter: In a bowl, mix the unsalted butter, chopped parsley, and crushed garlic until everything is evenly blended. Once mixed, divide this mixture into 12 equal parts and place them on a baking sheet. Pop them in the freezer until solid, which should take about 20 minutes.
- Shape the Chicken: While the butter is freezing, shape the ground chicken into 12 balls.Make a deep thumbprint in each ball and place a piece of the frozen herb butter inside. Wrap the chicken around the butter, ensuring it’s fully enclosed. Repeat for all the balls.
- Prepare for Breading: in a separate bowl, beat the eggs. In another dish, combine the panko bread crumbs, paprika, salt, and pepper. This creates a flavorful coating.
- Coat the Chicken Balls: Dip each chicken ball into the beaten eggs, then roll them in the seasoned bread crumbs. For an extra crispy finish, dip them back into the egg and then once more into the bread crumbs.
- Chill Again: Once all the balls are coated, place them on a baking sheet and freeze for another 10 minutes. This helps them hold their shape during cooking.
- Air Fry the Balls: Preheat your air fryer to 400°F (200°C). Place half of the balls in the basket, spray lightly with cooking spray, and cook for 5 minutes. Flip them over using tongs,spray again,and cook for another 5 minutes until they’re golden brown and cooked through.
And there you have it! In just a few simple steps, you’ve prepared Air Fryer chicken Kiev Balls that are sure to delight. these are perfect for game day, parties, or whenever you’re in the mood for a delicious snack.Enjoy!
Serving and Storage Information for Air Fryer Chicken Kiev Balls
These Air Fryer Chicken Kiev Balls are perfect for sharing, whether it’s game day or a cozy family dinner. Once you’ve made them, here’s how to serve and store them for maximum enjoyment:
Serving Suggestions:
- Garnish: Serve your chicken kiev balls with a sprinkle of fresh parsley or chives on top for a pop of color.
- dipping Sauces: pair them with a rich dipping sauce like homemade garlic aioli or a simple ranch dressing. A tangy lemon butter sauce also complements the flavors beautifully.
- Side Options: These balls go wonderfully with a side of fresh salad, roasted vegetables, or even crispy fries for a heartier meal.
Storage Instructions:
- Refrigeration: If you have leftovers, store them in an airtight container in the refrigerator. They should last for about 3-4 days.
- Freezing: For longer storage, freeze the chicken balls before cooking. Once frozen, transfer them to a freezer-safe bag or container, and they can last for up to 3 months.When you’re ready to cook them,just pop them directly into the air fryer; you might need to add a few extra minutes to the cooking time to ensure they’re heated through.
- Reheating: To reheat, place the chicken kiev balls back into the air fryer at 350°F (175°C) for about 5–7 minutes until heated and crispy again.
This dish is not onyl delightful when fresh but also maintains its quality when stored properly!
Helpful Recipe Notes and Troubleshooting Tips for Air Fryer chicken Kiev Balls
creating perfect Air Fryer Chicken Kiev Balls is easy with a few tips and some troubleshooting advice. Here are some things to keep in mind to ensure your cooking experience goes smoothly:
recipe Notes:
- Ground Chicken Choice: For the best flavor and texture, I reccommend using ground chicken breast. This keeps the balls lean while allowing the herb butter to shine through.
- Butter Options: You can substitute the unsalted butter with olive oil for a lighter option, but this will slightly change the taste and texture.
- Herbs and Spices: Feel free to customize the filling by adding herbs like thyme or oregano or incorporating a pinch of crushed red pepper flakes for some heat.
Troubleshooting Tips:
- If Balls Fall Apart: Make sure that the butter is fully frozen before adding it to the chicken. If they fall apart, try chilling them longer after coating with the bread crumbs.
- If Not Crispy Enough: Ensure you’re using cooking spray to coat the balls well before air frying.This helps achieve that desired crunchy texture. You can also increase the cooking time by a minute or two if needed.
- Cooking in Batches: Don’t overcrowd the air fryer basket. Cooking in batches allows for even cooking and browning.
With these ideas, you’ll be well-equipped to make and enjoy your Air fryer Chicken Kiev Balls to the fullest!